Projects
Challenge:
Each project is introduced to the student as a “challenge” (rather than a recipe to follow).
Details, constraints, initial ideas go here.

Inspiration
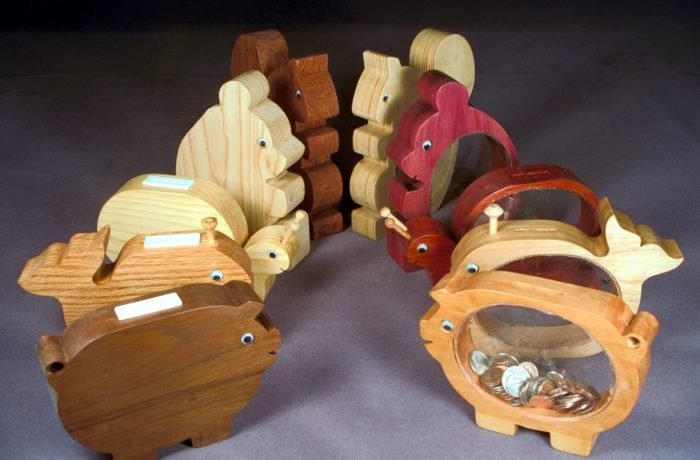
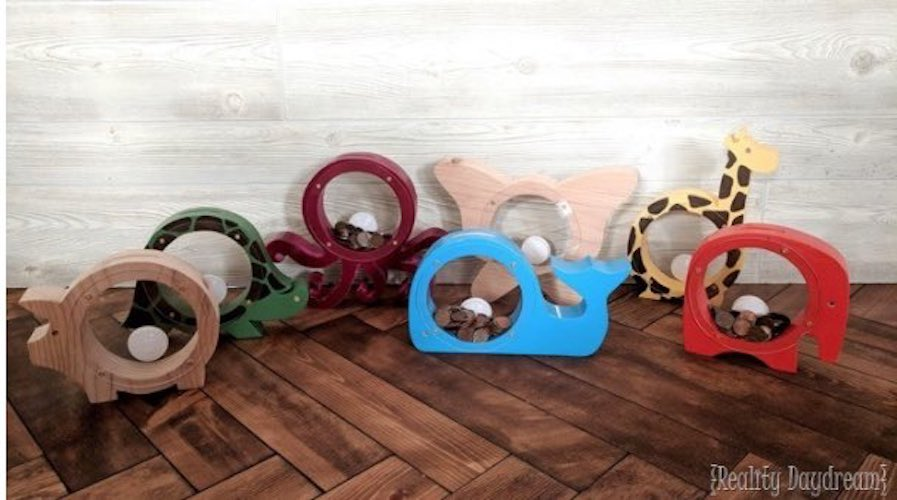
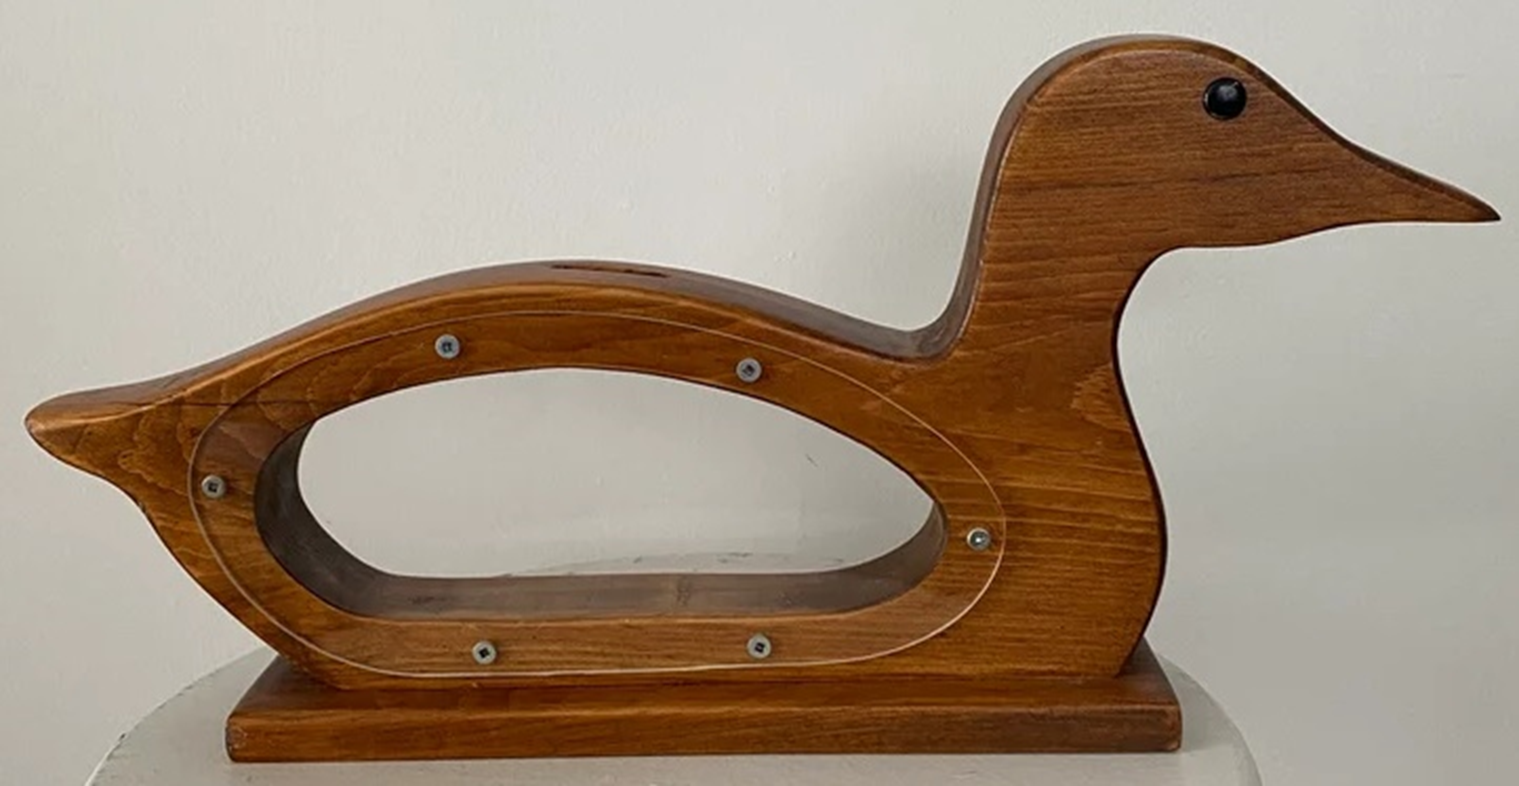
This section links to other related projects (usually other Internet pages) to show students similar projects.
Learning
The purpose of this project is to develop skills and knowledge from using soft-wood and acrylic plastic with hand and power tools. Finishing will be done to accent the silhouette and seal the wood.
Presentation: You will present your self-evaluation to your teacher. Your project may be put on display within the school and photographed for the school website.
CTF Curriculum Outcomes (Alberta Education, Career and Technology Foundations)
2. I use occupational area skills, knowledge and technologies.
3. I follow safety requirements associated with occupational areas and related technologies.
9. I create products, performances or services in response to challenges.
11. I communicate my learning.
Learning
Hand tools (metric measuring, files, file card, sanding blocks/paper)
Power tools (drill press*, band saw*)
Wood (material)
Plastic (material)
Finishing (markers, water-based varathane)
Use metric measurements
Student chooses shape/outline
Slot has to be diameter of toonie plus (so straight part = toonie diameter and extra half round at each end from drill bit)
Curves (half-rounds) actually better as does not concentrate the stress at the corners (aircraft)
*requires Tool License
Questions
How did you …?
How did you …?
Why did you …?
Instructions
Step 1 - Planning
You will draw sketches of your wooden bank - the following are provided for inspiration.
Two dimensional (2D) side view required to be handed in.
Other sketches can be included.
Planning - print accents on 1:1 drawing.
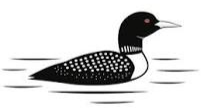
Use accents (e.g. Loon’s neck, frog legs and eyes) with a sealer (varnish) not full paint.
A marker may be used instead of paint. (Test on scrap wood to make sure the marker does not bleed on the wood.)
Requirements:
Name: ______________________ Class: _______ Date: ________
Full Scale (1:1) side drawing
Maximum size ____ cm x _____ cm
No thin pieces that might break off
Wall thickness minimum ____ mm
Outline of acrylic (plastic) shown
Accent markings shown in color
Dotted line for hidden object line (slot - larger than a toonie)


Acrylic - hard and brittle (compare materials to rubber or foam) image

Idea to Sketch to 1:1 drawing to Finished Product

Step 2 - Interior Shaping
The inside (interior) is cut out first while the piece is the largest (strongest) to prevent breakage
Drill Press License
Type of drill bits
Series of holes
Connecting holes
Hand saw (not scroll saw)
Files: Rasp, Double Cut, Single Cut - rough, coarse, bastard, second-cut, smooth, and dead smooth
Sand (grit of paper)
Chamfer edge to prevent breaking
Step 3 - Exterior Shaping
Then exterior cut
Band Saw License
Go / No go Gage (literacy: Gage versus Gauge - share what you know, don’t show off: computer spell checker)
Step 4 - Cut slot
Drill ends
Drill Press License
Caution, breakout - ease off at end of hole (use masking tape to show depth)
Then exterior sand/file
Step 5 - Plastic sides
Clear acrylic
Slight oversize acrylic and file back to final size (and remove cut marks)
Drill Press License
Twist drill bits (hard and brittle)
Pan head screws (no wedge - explain simple machines, cause cracking in acrylic)
Drill acrylic - angle on drill / type of drill to prevent cracking
Then file edge of acrylic

Step 6 - Finishing
Smooth
Accents - use markers (as indicated on your original plan) to highlight the surface of you bank.
Seal / varnish to protect the wood (from drying out) - need drying rack and secure (lockable) must be water based. (Varnish is the old material used to seal wood. Now, the word “varnish” is often used as a verb, like “painting”.)
-
Notes to the teacher (that the student may choose to read)
-
Link here to specific safety for this “shop”
-
Link here to General Safety page