Kitbashed M4 Sherman Model | 1/35th Scale
Hello, I’m Alexander. Today’s build log will be a (fictional) allied Sherman tank from World War II in 1/35th scale.
My aim for this build was to combine as many kits and accessories possible to improve my building skills. Additionally, the heavily modified builds within many magazine articles inspired this project. The only improve like those builders is to practice. I had tons of fun mashing the different components together. Without further ado let’s begin!
See the build video:
I have built a couple Sherman tanks before this build; thus, I had a large collection of spare components. I bought all the kits used at my local AMPS model show (product links can included below). Italeri’s M4A1Sherman was the main kit, with extra components from Dragon’s Firefly IC Hybrid Hall, and Tamiya’s US Medium M4 Sherman. The turret is Legend's Sherman Early Low Bustle Turret Set, containing a resin turret and aluminum gun barrel. Panda Plastics (formerly RHPS) tracks added - WE 210 Rubber Double tracks. I created a video review of these tracks before.
Track Review:
Stowage included: Tamiya’s Allied Vehicle Accessory Pack and Formations’ Sherman IC Firefly Stowage Boxes. Figures are from Tamiya's US Howitzer M8 Motor Gun Carriage I built a few years ago.

Products used:
Tamiya Allied Vehicle Accessories - US / CAN
Italeri M4A1 Sherman - US / CAN
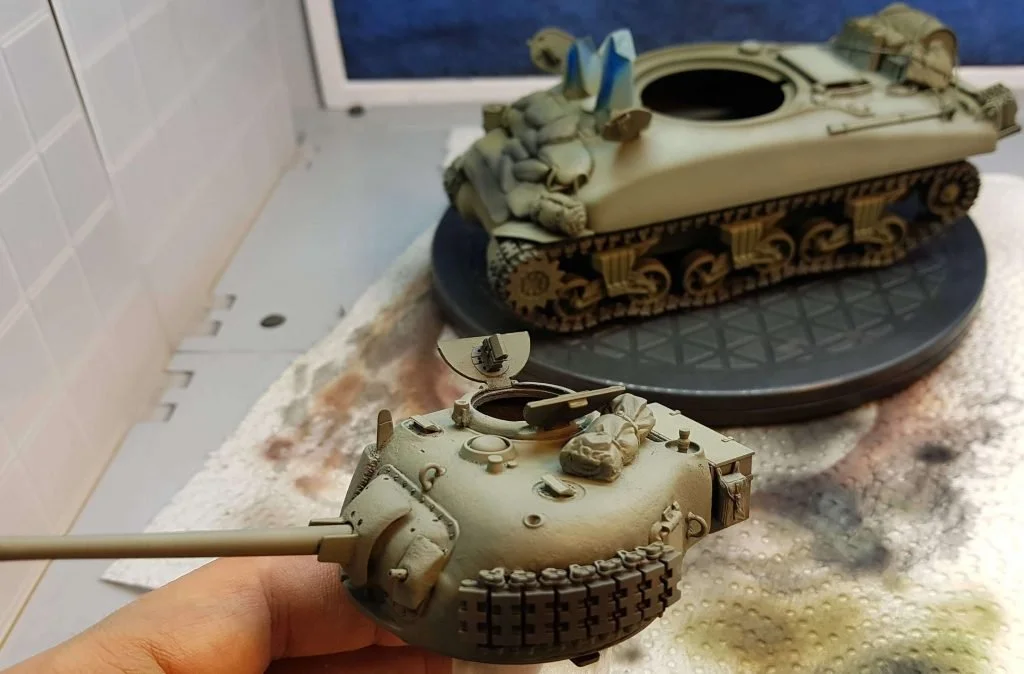
I built the aftermarket turret set first, modifying the resin turret to use the kit's ring mount. Otherwise, turret assembly was straightforward. I first used a hobby miter saw, but switched to a rotating cutting tool to finish the work faster. Formations' periscopes added to the open hatches, and a machine gun to the hull. Then the rest of the hull and running gear where assembled.

Tamiya roadwheels used as I preferred the open spokes and the components had less of a seamline. Removing the springs from the running gear made the Lee-style suspension adjustable. Tracks were a joy to assemble, only requiring a friction fit (no glue applied!). Without glue, the tracks are 100% workable. I placed the model on the base first to set the suspension was in the correct position before glue. I recently learned from a club-member is Sherman tanks had very tight tracks. To show the high tension, track links were deeply pushed into the dry sprocket. (There should be no gap between the connector pieces and the teeth of the sprocket.)
Again, using a rotary tool, the lower glacis plate was swapped with Dragon’s for the superior cast texture. Two crew member busts were painted and glued in since it would be difficult to access later. The commander had his shoulder modified to look more natural in the Sherman turret. To avoid any eyesores, black paint was applied to the interior of the vehicle. My local judge's rules state that if a hatch is open the interior will be judged unless a crew member is in the space.

After hull assembly, miscellaneous stowage was arranged to create a satisfying aesthetic. A mixture of soft and hard storage helps create more visual interest through adding different textures and colors. Then I checked if the storage seemed plausible in real life. Remember, items would be strapped down and not block any motion or functionality. Also, real tree branches/twigs where cut to size and added as extra protection. Once happy, stowage was glued and secured using a braided string.

With everything glued down, I sculpted sandbags from Tamiya’s two-part epoxy putty. My first attempt at sculpting sandbags was surprisingly well done. Other improvements to try include: texturing and having some torn or leaking bags as well. The light guards are slightly bent, aiding the illusion of having non-trivial weight.
After assembly, the entire model was primed black. The undercoat was US Olive Drab, followed by a highlight with Olive Drab. Light Grey Green served as the final highlight pass. This was all done using an airbrush and Vallejo paints, specifically the US olive drab paint set. Details and markings were brush painted. The bulk of the weathering was chipping, rust on the tracks, mud, grime on the muzzle and where the fuel caps are. Then, the logs were secured to the hull and touched up with some paint.

Voila, here is the completed tank. Thank you for your support, if you would like to learn more about the base below the Sherman click the link here.